

Everything in our life is a small, medium, or large project. It's always the same steps but with different scopes of work and efforts. As you get started on your project, whichever size it may be, project management forms the central part of its success.
Regarding project management, we refer to applying skills, processes, methods, knowledge, and experience to achieve your project goals. It ensures that the final deliverables are constrained to specific, reasonable timelines and budgets.
You need the right instruments or tools to manage your PM activity successfully.
Various programs exist for this purpose, the key among them being the Microsoft Project family. This article takes you through Microsoft management software, covering all the key details you need to know and use in day-to-day project management work.
Let's dive in!
Table of contents
- What is the Microsoft Project family in detail?
- How to create your first project in Microsoft Project Desktop
- How to get started with MS Project Desktop?
- How to create and manage your project schedule in MS Project Desktop?
- How to create, add, and manage project tasks in MS Project Desktop?
- How to assign tasks to your team members in Project Desktop?
- How to use different project views in Project Desktop?
- How to create reports in Microsoft Project Desktop?
- How to implement PPM in Microsoft Project Desktop with PPM Express
- The best MS Project learning is in practice
What is the Microsoft Project family in detail?
As Microsoft defined its product, MS Project "meets the simple, powerful, reimagined Project for everyone" - we can't agree more.
Firstly, when we say MS Project, we mean the whole family of products, like MS Project Online, MS Project on-premises (Desktop), and Project for the web. They have much in common but differ in essence: all are great project management tools but specialize in various companies' domains, with their restrictions and needs.
Today, we will speak about the MS Project Desktop version, guide you through the first steps within this project management giant, and help you uncover the following topic: Is there a future for desktop software, and what does it look like?
Don't waste your time – meet MS Project Desktop.
What is the purpose of the Microsoft Project in general?
Microsoft Project intends to help users develop realistic project goals through well-thought-out schedules, managing budgets, and distributing resources. Users can create projects, track tasks, and report results. Furthermore, it gives project managers and project owners significant control over their resources and finances. That is achieved through simple processes for assigning resources to tasks and budgets to projects.
There are a lot of tools for professionals, like Gantt charts, Kanban boards, and project calendars, but this software isn't just for experienced users; even junior PMs can easily handle it. Why? Because there are intuitive user interfaces, pre-created templates, and one of the greatest helpdesks to discover the world of Project management by Microsoft.
When adopting Microsoft Project on-premises, you may need to explore the customizable wizard for guidance during project creation, task assignment, resource assignment, and reporting results.
Microsoft Project Online VS Desktop: What is the difference?
As we mentioned before, there are a lot of different products within the MS Project family. Still, the most popular ones are MS Project Online and Project Desktop, which differ significantly. MS Project Online targets multiple users where you can assign tasks, track time, and look into other related project elements. The desktop version mainly targets project managers who use it to define and track tasks.
The Online basic version is limited compared to the desktop Standard version and is primarily designed as a Microsoft Project Portfolio Management solution. Users can manage projects in the organization and dynamically track resource utilization.
On the other hand, Microsoft Project Desktop is best suited for standalone projects. You can have an on-premise MS Project server when you need to synchronize desktop versions of Microsoft Project across the organization.
Project managers using MS Project Desktop save their information as MPP files to share with other team members to use separately when the project evolves. Alternatively, they export it to MS Project Online to use it on cloud-based software.
MS Project on the desktop is limited in integration functionality – connection to other software is restricted because of the standalone nature of the product. The roadmap function is only available in the Online version.
Regarding advanced functionality, the project portfolio management feature has only the heaviest version of Microsoft Project Online - Plan 5; the desktop version has to use only third-party solutions (like PPM Express, but about this later).
MS Project Desktop strengths and weaknesses
The Microsoft Project Desktop is a good option if you're looking for a powerful project management tool that enables teams to organize and manage their projects of all sizes. But, it has its advantages and missing features.
Here, we look at Microsoft Project Desktop's pros and cons to help you decide if it fits your needs best.
STRENGTHSWEAKNESSESIntegration – Works seamlessly with dominant technologies such as Power BI, Microsoft Teams, Microsoft SharePoint, MS 365 Office Suite, and Skype (but in an advanced Professional pricing plan)Cost limitation – Small businesses often cannot adopt the software due to the cost factor. Buying a license for on-premise may prove challenging.Flexibility – Flexible project management software that can be extended to other requirements like financial management and road mapping.Customer support – Users can access reliable customer support from partners, consultants, and third-party providers.Customer support – Users have access to reliable customer support from partners, consultants, and third-party providers.File compatibility – Since MS Project Desktop files are saved in a proprietary format, desktops that do not have the software cannot open.

A few words about Microsoft Project Desktop pricing
Microsoft Project Desktop does not follow the subscription model. Instead, you will make a one-off payment for the software license per user. The amount incurred depends on the version chosen.
For instance, Microsoft Project Standard 2021 goes for about $680. The price may seem reasonable for some organizations. Still, there is a catch: it cannot synchronize with Project Online, limiting you from collaborating with other Project Server and Online users.
To get more features, you must purchase a higher version – Project Professional 2021, which costs around $1,200. The key additional features with this option include a timesheet, resource management, advanced analytics, and sync with Microsoft Project Standard and Online.
As we discovered the basic information about MS Project On-premises, let's examine how to use this product in practice – let's go!
How to create your first project in Microsoft Project Desktop
Even if the user interface may seem hard-understandable, we'll guide you through the main functions and help you define your way of MS Project usage.
How to get started with MS Project Desktop?
To start with Microsoft Project Desktop, you must download the software, install it, and open it on your desktop.
The first step would be to sign in with the account you associated with this version of Project with the purpose of downloading MS Project Desktop. The official link is www.office.com.
After signing in, follow the steps below for your subscription or non-subscription version of the tool. From the Microsoft 365 home page, you should select Install Office apps > Other install options.
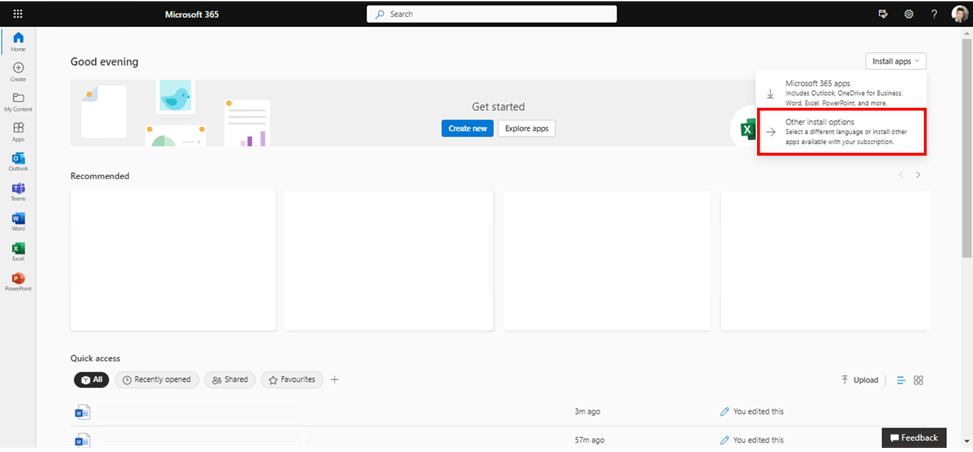
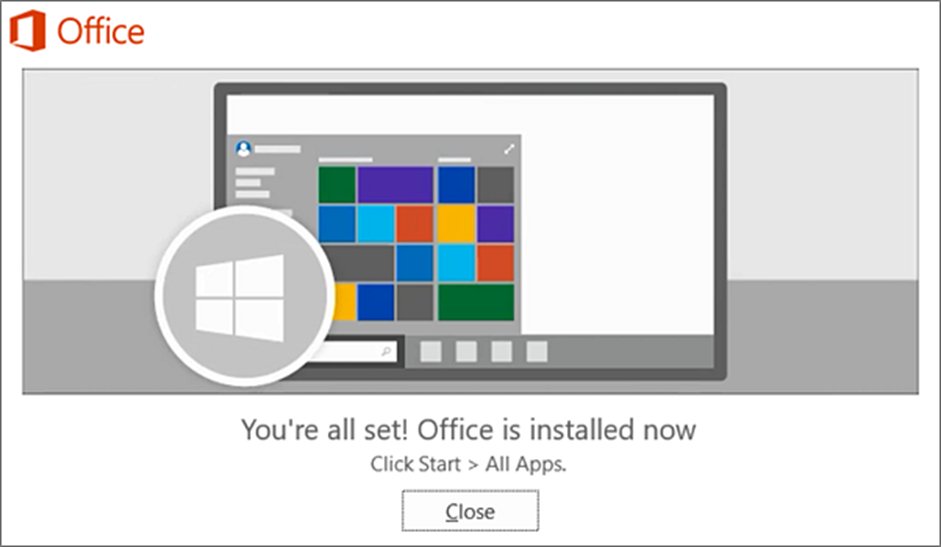
Under the Software menu, you must select Project, choose the language and the bit version you want, and then select Install – the installation process begins. After all, you'll see the window with greetings.

When the installation is over, you'll see the greetings screen, which approves the opportunity to use Microsoft Office products.
You can then begin inputting data into the task plan of the Gantt chart, including task name and duration. But first, let's create your basic project.
How to create and manage your project schedule in MS Project Desktop?
When you start a new schedule, you add tasks and organize them efficiently so that the project end date occurs as soon as possible. So, the first step will be to create a new project (let's start from the beginning).
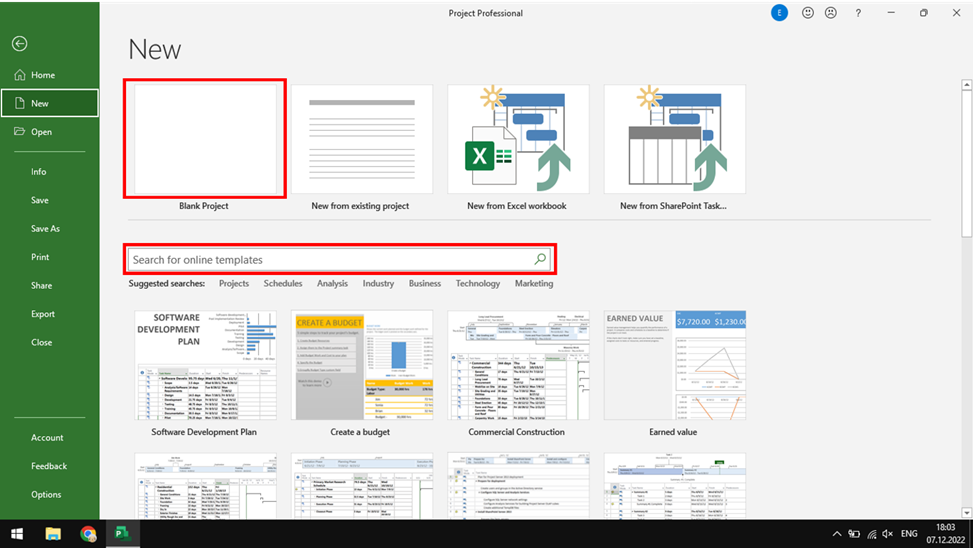
You can start by creating a new project from a template - many of these templates have been created by industry experts to help you get started.
To do this, you should:
- Click File > New.
- Search for templates in the box or click the template you want below.
- In the preview dialog box, click Create.
Also, the following options are available for you: create a new Blank Project from scratch (a clean canvas to do what you want to do without any guidance), Open an existing project, and Open a project from a previous version (if some of your teammates love not to change their habits).
After you've created the project, we need to fill it with tasks.
How to create, add, and manage project tasks in MS Project Desktop?
To add your first task, just enter information in your Gantt chart's cell within Microsoft Project Desktop – it is as simple as it sounds. You can build all your projects by using that approach.
Tiny hint: if, before the MS Project Desktop, you were working in MS Excel – don't be nervous; it is similar to a familiar spreadsheet tool. You can import Excel data right into Project.
There is also a more complicated way to add tasks to the Project Desktop by using shortcuts from the menu. To add a task, select the row below where you want a new task to appear. Then select Task > Task.
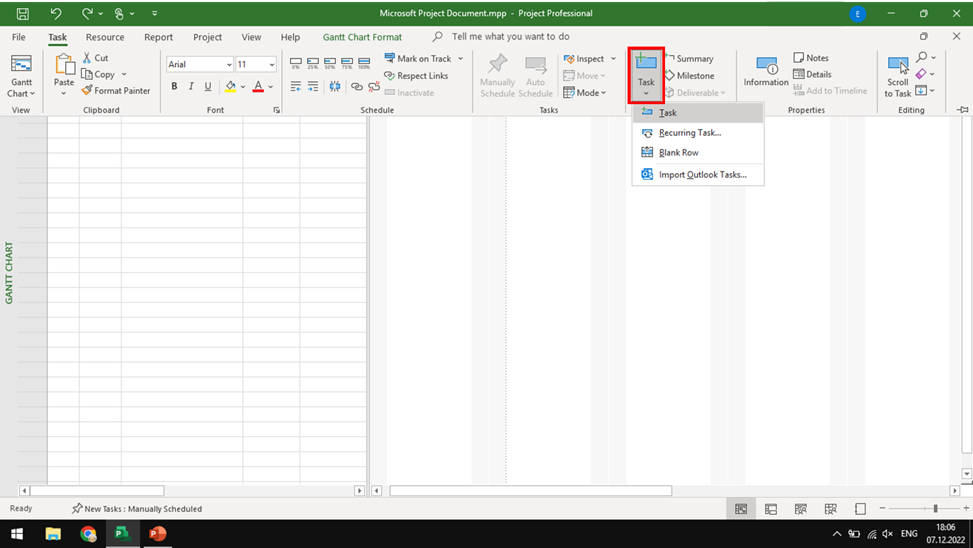
Type the task name in the inserted row. And this is all; the task is ready for accomplishment. You also can set the length of task duration and the amount of work that people perform on tasks – it's all up to you.
After you've added all the needed tasks, you should organize your workspace. There are a few options available for realization:
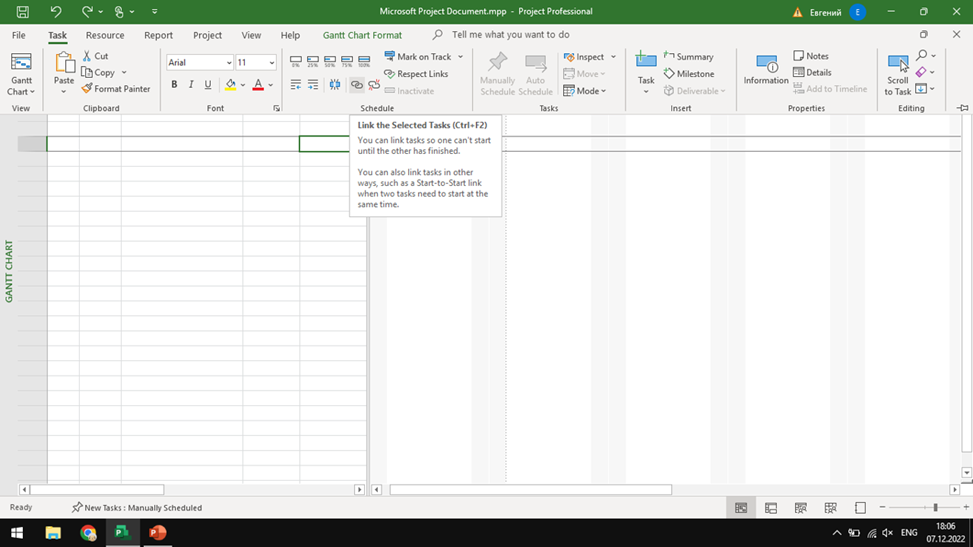
- Link tasks in a project – where you can connect a few tasks into one dependency. Linked tasks reflect project realities. When one task changes, so do the other
- Outline tasks into - show task hierarchy by creating subtasks and summary tasks
- Split a task - to show when it stops and starts.
This functionality can help you coordinate your tasks properly.
But where are all your tasks indicated? Is there any data about start and finish dates that should be in a calendar? We need to set it up.
First, you have to set working days for everyone on the project. It can help you analyze your colleagues' workload. Also, everybody needs to rest, so don't forget to add holidays and vacation days to your calendar.
The final step is to save and publish the schedule. You can save a local copy of your project as an MPP file or make your project work available to other users on the Project Online.
If you're looking for an opportunity to send somebody your project information or show it as a document - save a project file as a PDF.
How to assign tasks to your team members in Project Desktop?
Often, after the tasks were created, we needed to assign our teammates to work on them. After all, projects don't get done by themselves. Let's figure it out:
- In the Gantt chart, go to the Resource Names column.
- Click the arrow and pick the people to work on the task.
- If you don't see the name of the person you want to assign, enter a new name.
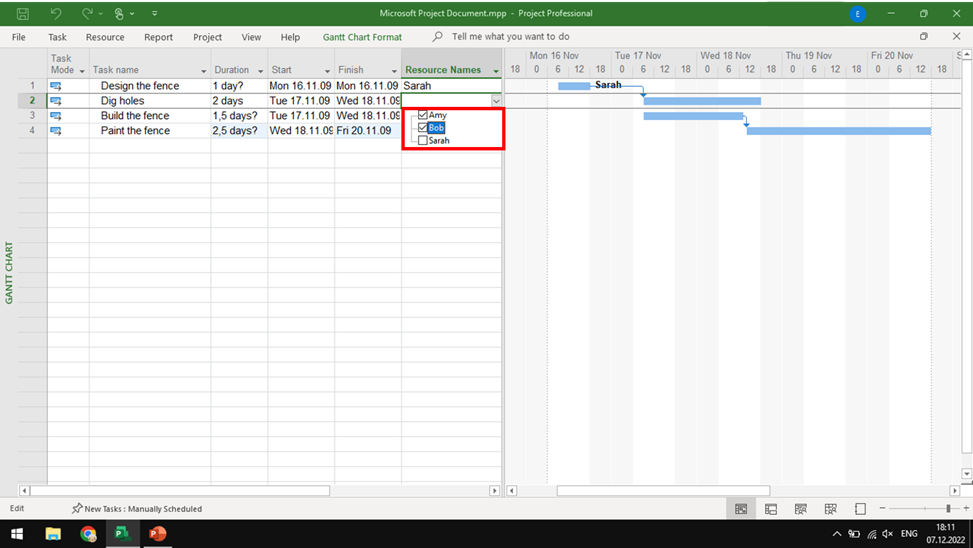
If you can't see the names – don't worry; no one has been added to the project yet, but we can fix it. You can go by two ways:
- Enter a new name in the Resource Names column
- Add resources to your project before assigning them to work on tasks (use the link to read the helpdesk article about how to add a new teammate to your project)
Yes, it's that simple.
How to use different project views in Project Desktop?
The correct view of your project is half of its success: you can see the information on Gantt chart bars, use the calendar to plan your work, place your tasks on a timeline, or (just to be old-fashioned) - use tables.
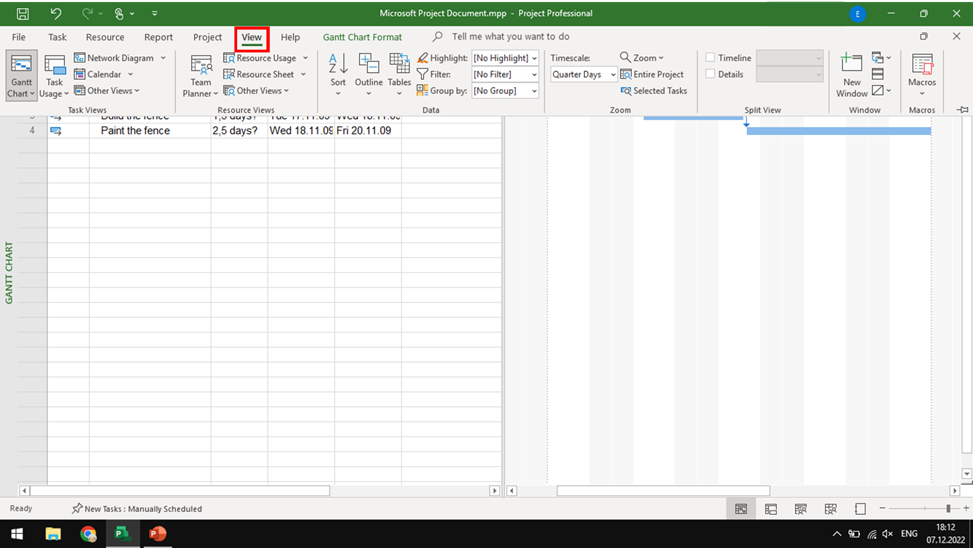
What do you need to do to change your project view? Firstly, you should click the View tab.
Here, you can choose whatever view you want: A lot of helpful presentation opportunities are available in the Task Views or Resource Views.
But, when you become an MS Project Desktop pro, you're looking for more flexible options to show your creative mind while customizing a view quickly and effectively.
If it's your story, you should click the Format tab, and right there, you can adjust the formatting options you want to use.

Pay your attention: not all views have the same formatting options.
How to create reports in Microsoft Project Desktop?
Of course, there are a lot of managers who ask you about how the project is going. We are in the same situation.
With Project Desktop, you can create, customize, and share reports of whatever project data you want. And to make your work slightly easier – there are a lot of ready-to-use reports right in MS Project Desktop (no manual updates required). Just see a list of all reports and how you can use them.
What do you need to do? Firstly, click the Report tab. You can see View Reports there, and right here, you can choose the type of report.
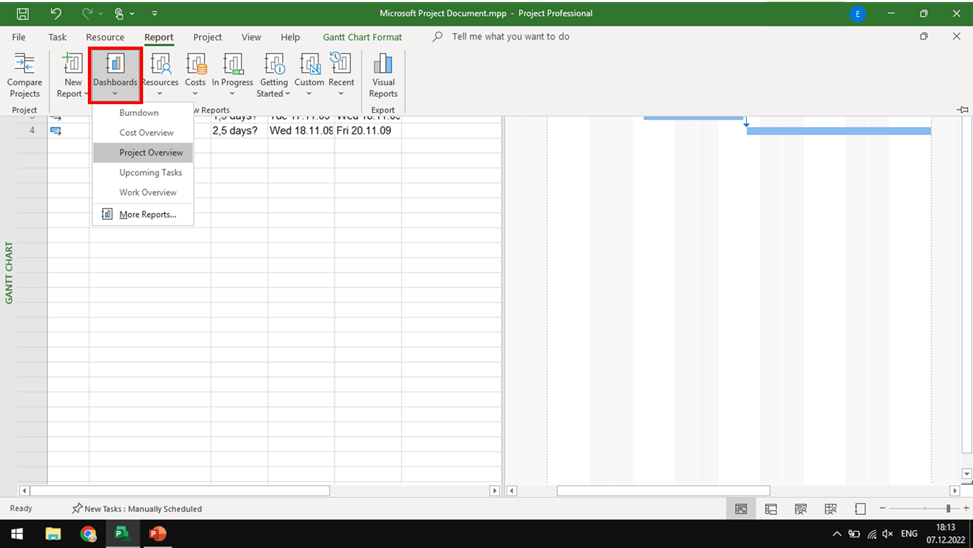
You also can start from scratch –don't be afraid to be fancy: you just need to click New Report and choose from the Blank, Chart, Table, and Comparison Reports.
After this, the new Report Name window will open, where you should give your report a name.
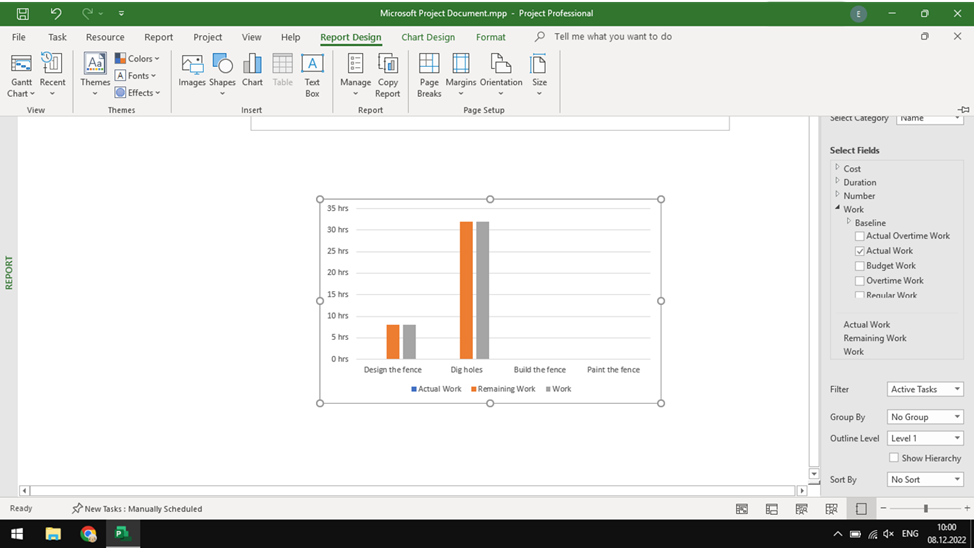
Here, you can customize your new Reports. Firstly, it seems like the interface is still the same, but wait a minute – here you can find new Tabs, like Report Design, Chart Design, and Format (tabs can differ according to the Report type you've chosen).
Feel free to play around and find a suitable approach to design reports.
How to implement PPM in Microsoft Project Desktop with PPM Express
MS Project provides organizations with some important PPM functionalities for their projects. However, you may feel stuck sometimes due to a lack of helpful features.
As we mentioned earlier, building a project portfolio within Microsoft Project on-premises is impossible. And here comes the PPM Express, which can help to expand the functionalities further to simplify your project management undertaking.
Within PPM Express, we have a perfect function for building PPM - PPM Express Project Publisher. With it, you can publish your Microsoft Project Desktop project to PPM Express at the click of a button and connect it with MS Project Online, Azure DevOps, Smartsheet, and Jira Software to the whole picture of your PM performance.
This functionality is great for companies who use Project Desktop clients on the work and project management level and need a bigger picture view of all projects from Project Desktop in one place, PPM Express. Here is a short video overview of how it works.
https://vimeo.com/778839150
Also, let's review how it works in detail – from installation to synchronization in one place.
How to install and configure PPM Express Project Publisher
One of the essential things when installing and configuring PPM Express Project Publisher is to keep things as simple as possible. Ensure that you have closed the Project Desktop client before beginning the installation.
We want to show the whole process of installing Project Publisher:
- Download the File from PPM Express by following this link
- Open it to launch the install wizard and start the installation process
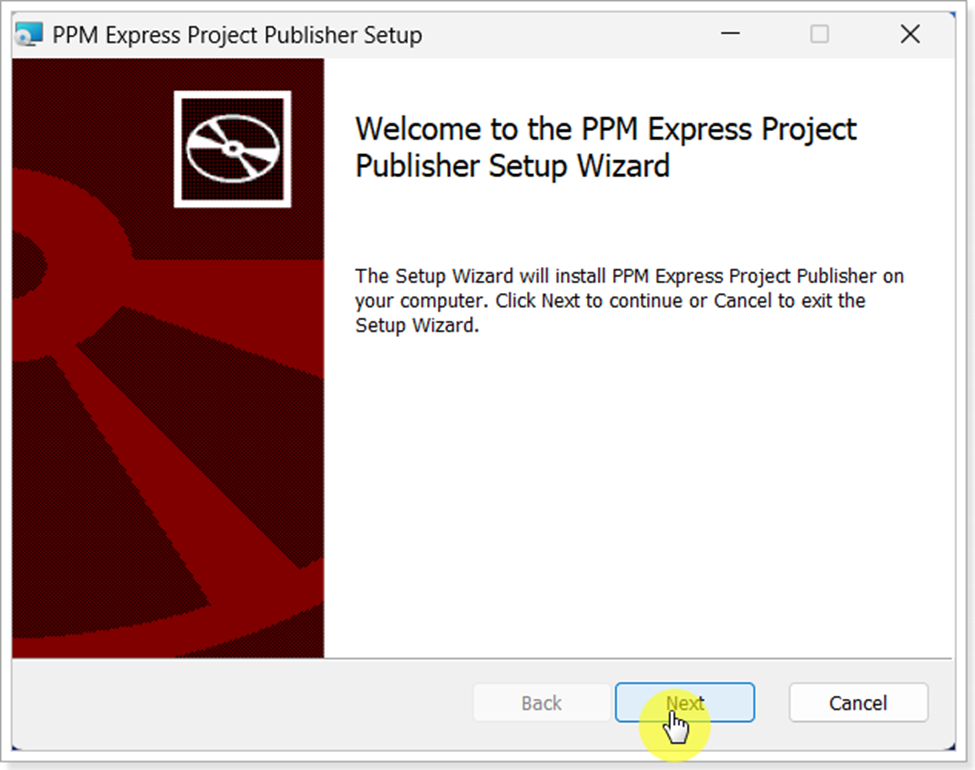
- Accept the License terms on the next screen of the install wizard and click Next
- Use the default installation folder and click Next; after that - click install
- Click Finish once the installation is complete – so simple.
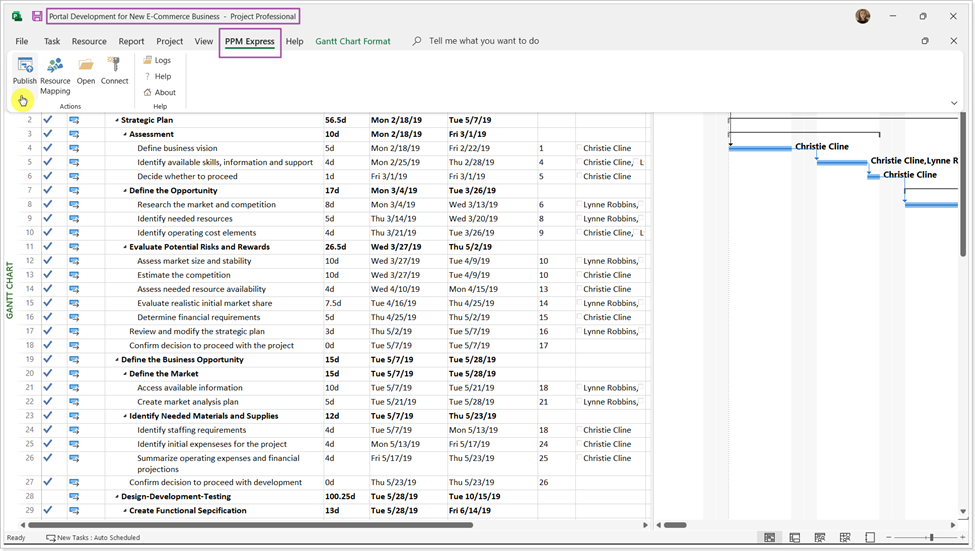
After you installed PPM Express Project Publisher – it's time to set up it:
- Open the Project Desktop client and go to the PPM Express tab. This tab is automatically added after successful installation.
- Click on the Connect button

- Input the PPM Express Tenant URL and Token. You can copy this from PPM Express
- From the gear button, open the Automation settings page
- Click New Token > New Project Desktop Token link
- Enter the token name and expiration date, then click Generate Token
- Copy the token and paste it into the Project Desktop
How to publish projects from Microsoft Project Desktop to PPM Express
When handling MS Project multiple projects, you will find it highly efficient to publish your projects to PPM Express. Here is how you can do it:
- Launch Project Desktop where you just established a connection to PPM Express
- Open the project that you would like to publish to PPM Express
- Click on the PPM Express tab > Publish
- Give the project a name and create a new project that gets published in PPM Express. You may also publish the project to an existing PPM Express project by selecting the required project from this.
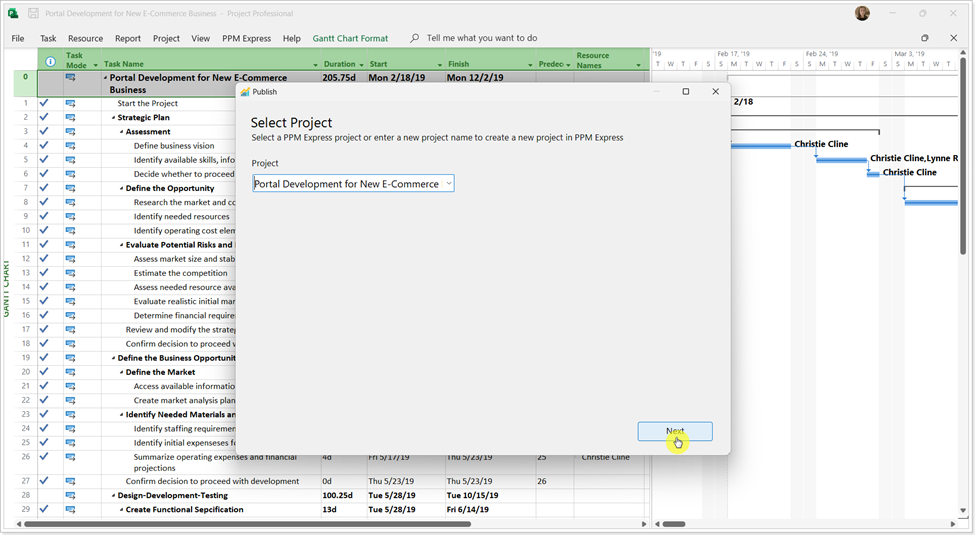
- Click Next and perform resource mapping on the new page. Follow the wizard to the end until you click on Finish
The best MS Project learning is in practice
Most Microsoft Project reviews focus on individuals with a solid technical background. The sole purpose of this guide was to help a newbie quickly start with Microsoft Project without getting confused. We hope our simple instructions can help you make your first steps in Project management using Microsoft Project On-premises.
Always remember that if you have additional information, you can visit Microsoft's official helpdesk with guidebooks, how-tos, video instructions, etc.
Also, as seen in the guide, you can connect Microsoft Project Desktop to PPM Express to expand the possibilities from classic project management to portfolio management.

