We haven't updated for a while now. We changed a number of things last month. This release is primarily related to Resource Allocation Management and Resource Dashboard page. Let's overview them in detail:
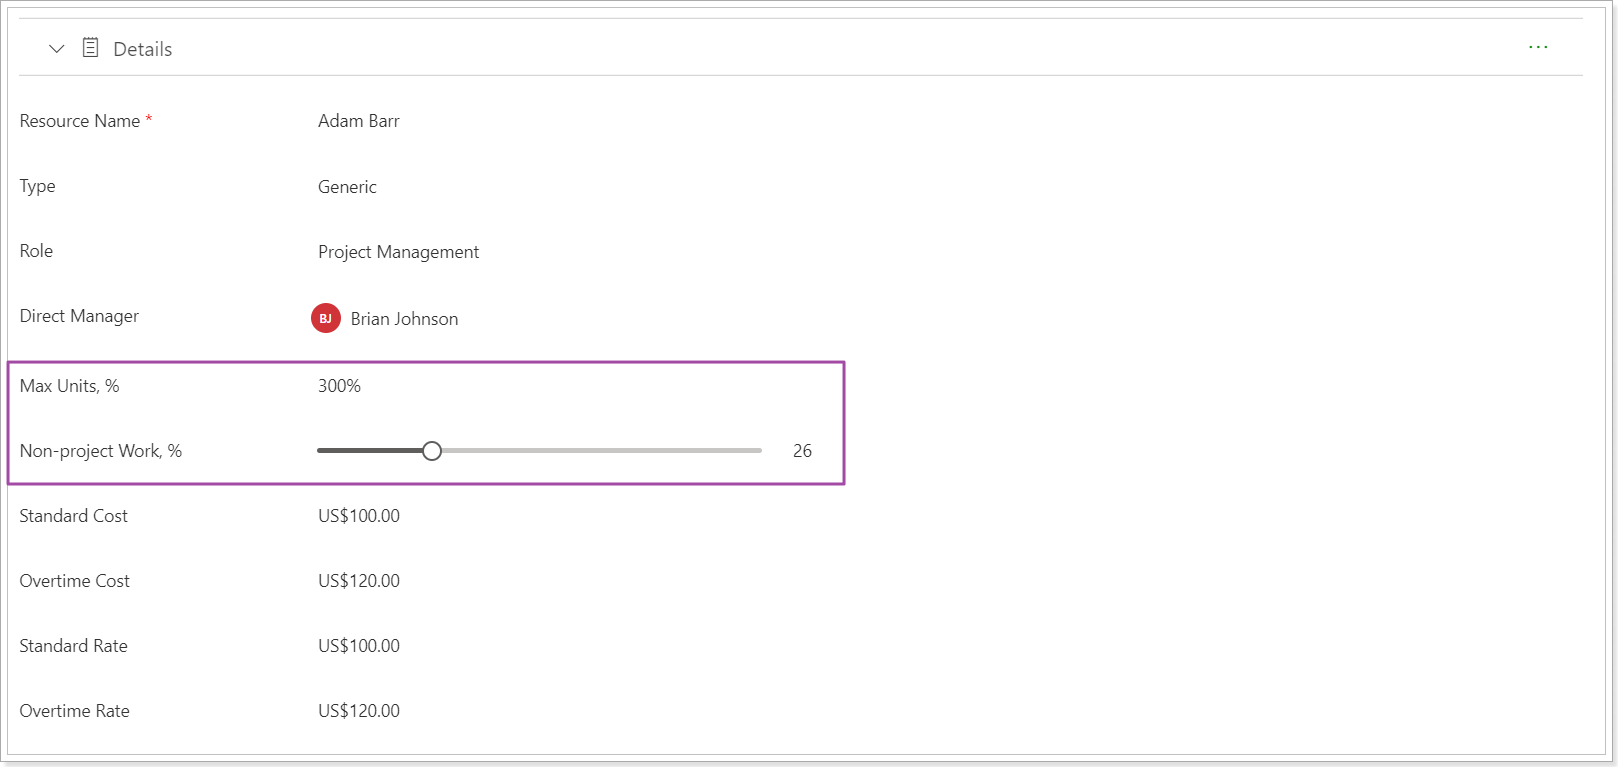
1. An option to define the “Non-project Work” for a resource was added on the Resource Dashboard page.
If a resource is engaged for some kind of non-project work, this can be defined in a specific field that was added to the Resource Dashboard Details section. In this case, the capacity for this resource will be recalculated accordingly to the projects.
2. It is now possible to define the Max Units for Resources as >100% to allow planning of work on a resource level as a team.
This may be useful for cases when, in the project planning stage, there is a need to assign generic resources for tasks. For example, you can set Max Units to 300% for Marketing generic resources. When assigning users, you can set the required value for each resource out of the planned 300 % for a generic resource.
3. The wording for the views and layouts option was changed, and the word ‘Layout’ was added when the layout is selected in the ‘Default’ drop-down.
Before: The layout name was displayed when selected.

Now: The word 'Layout' and the layout name are displayed.

4. The tabs on the Configure Connection pane were renamed to Project Progress, External Items Mapping, and Project Mapping (for Monday.com, Jira, and Azure DevOps connections).
Before: The tabs were named Project, Progress, and Tasks.
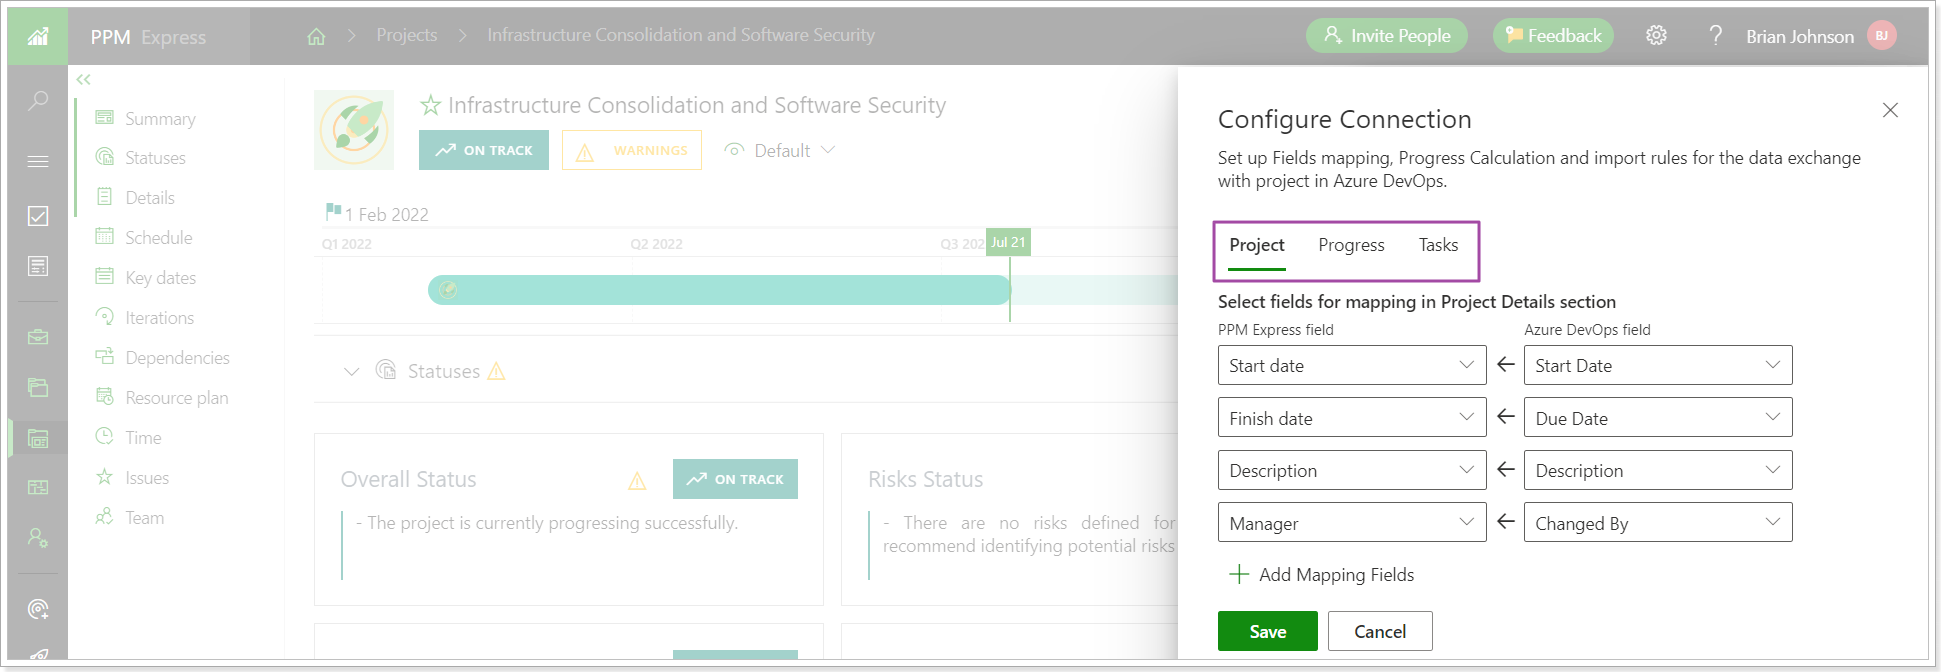
Now: The tabs are named Project Progress, External Items Mapping, and Project Mapping.

5. Import/Export of Ideas to/from .csv file option was added to PPM Express.

6. The values in the fields (both OOB and custom fields in Ideas and Projects) are now copied over when a project is created from an idea if the corresponding fields are completely matched by type and name.
7. The field ‘Skills’ was added to the Resource Dashboard.
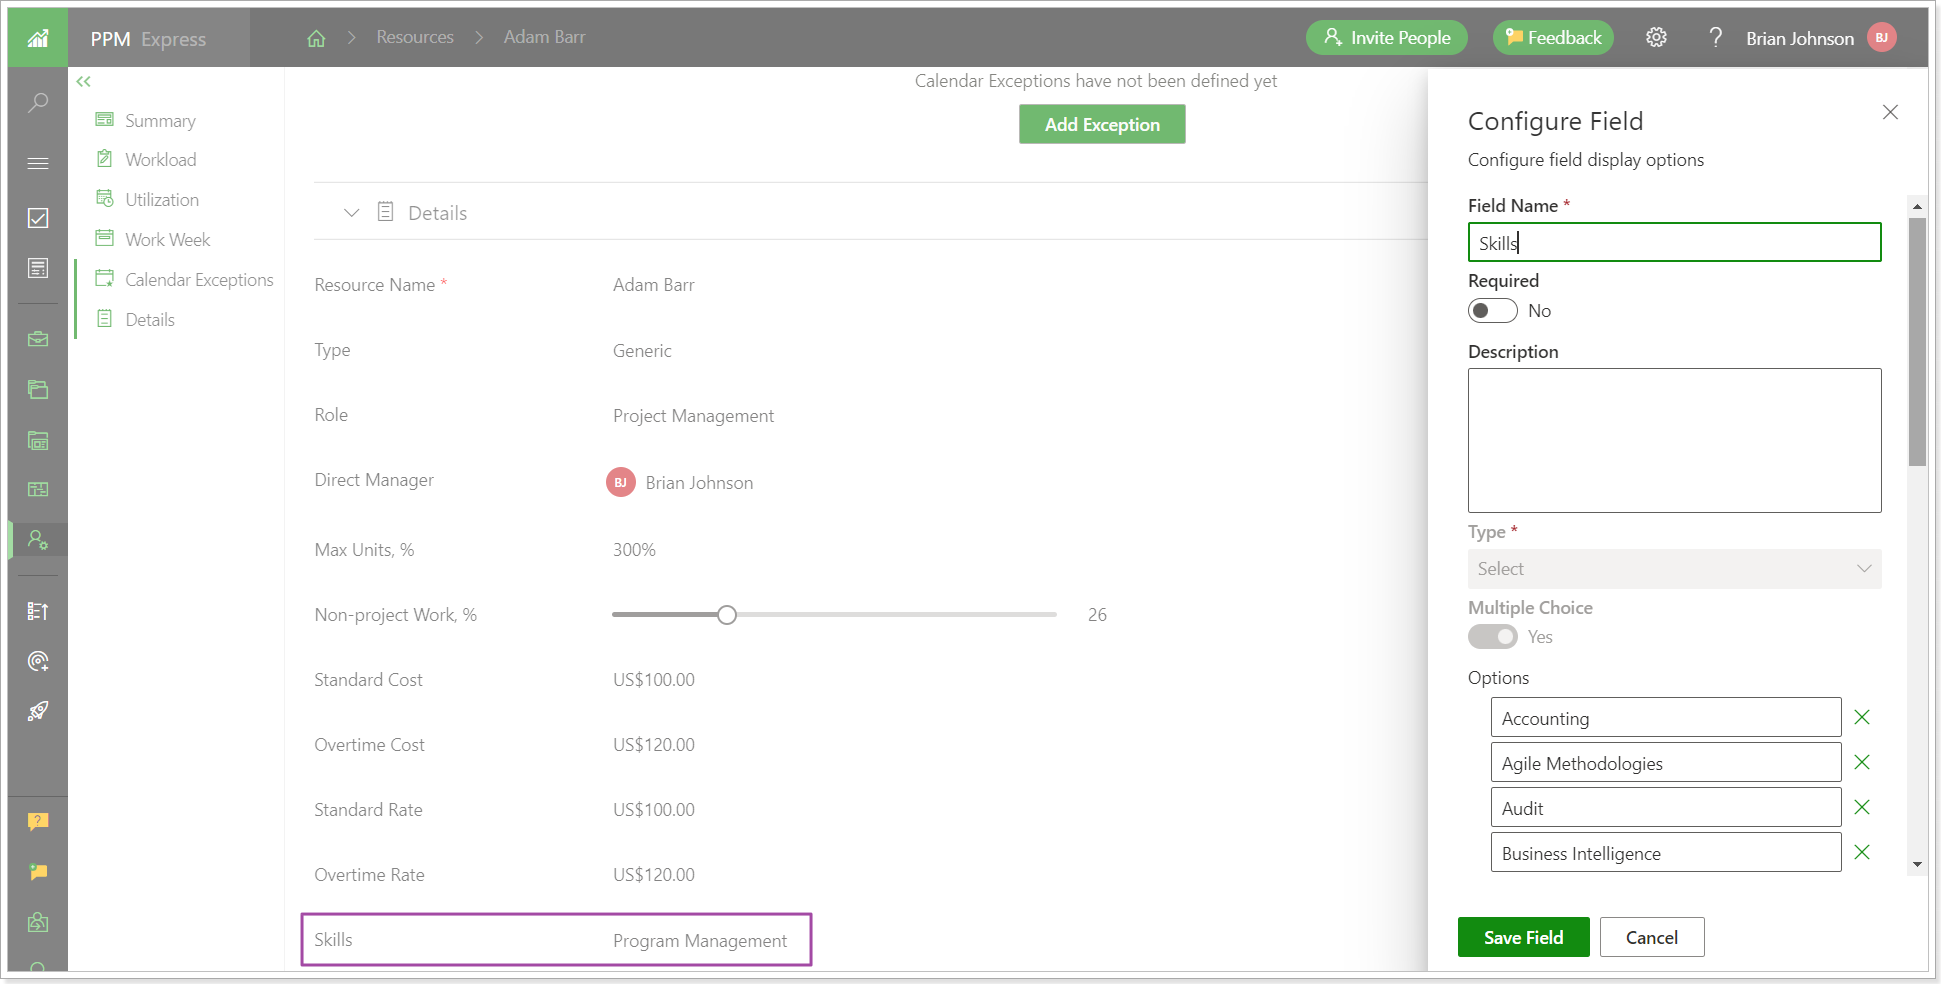
You can add skills to your resources and then search for resources by skills when assigning them to projects.

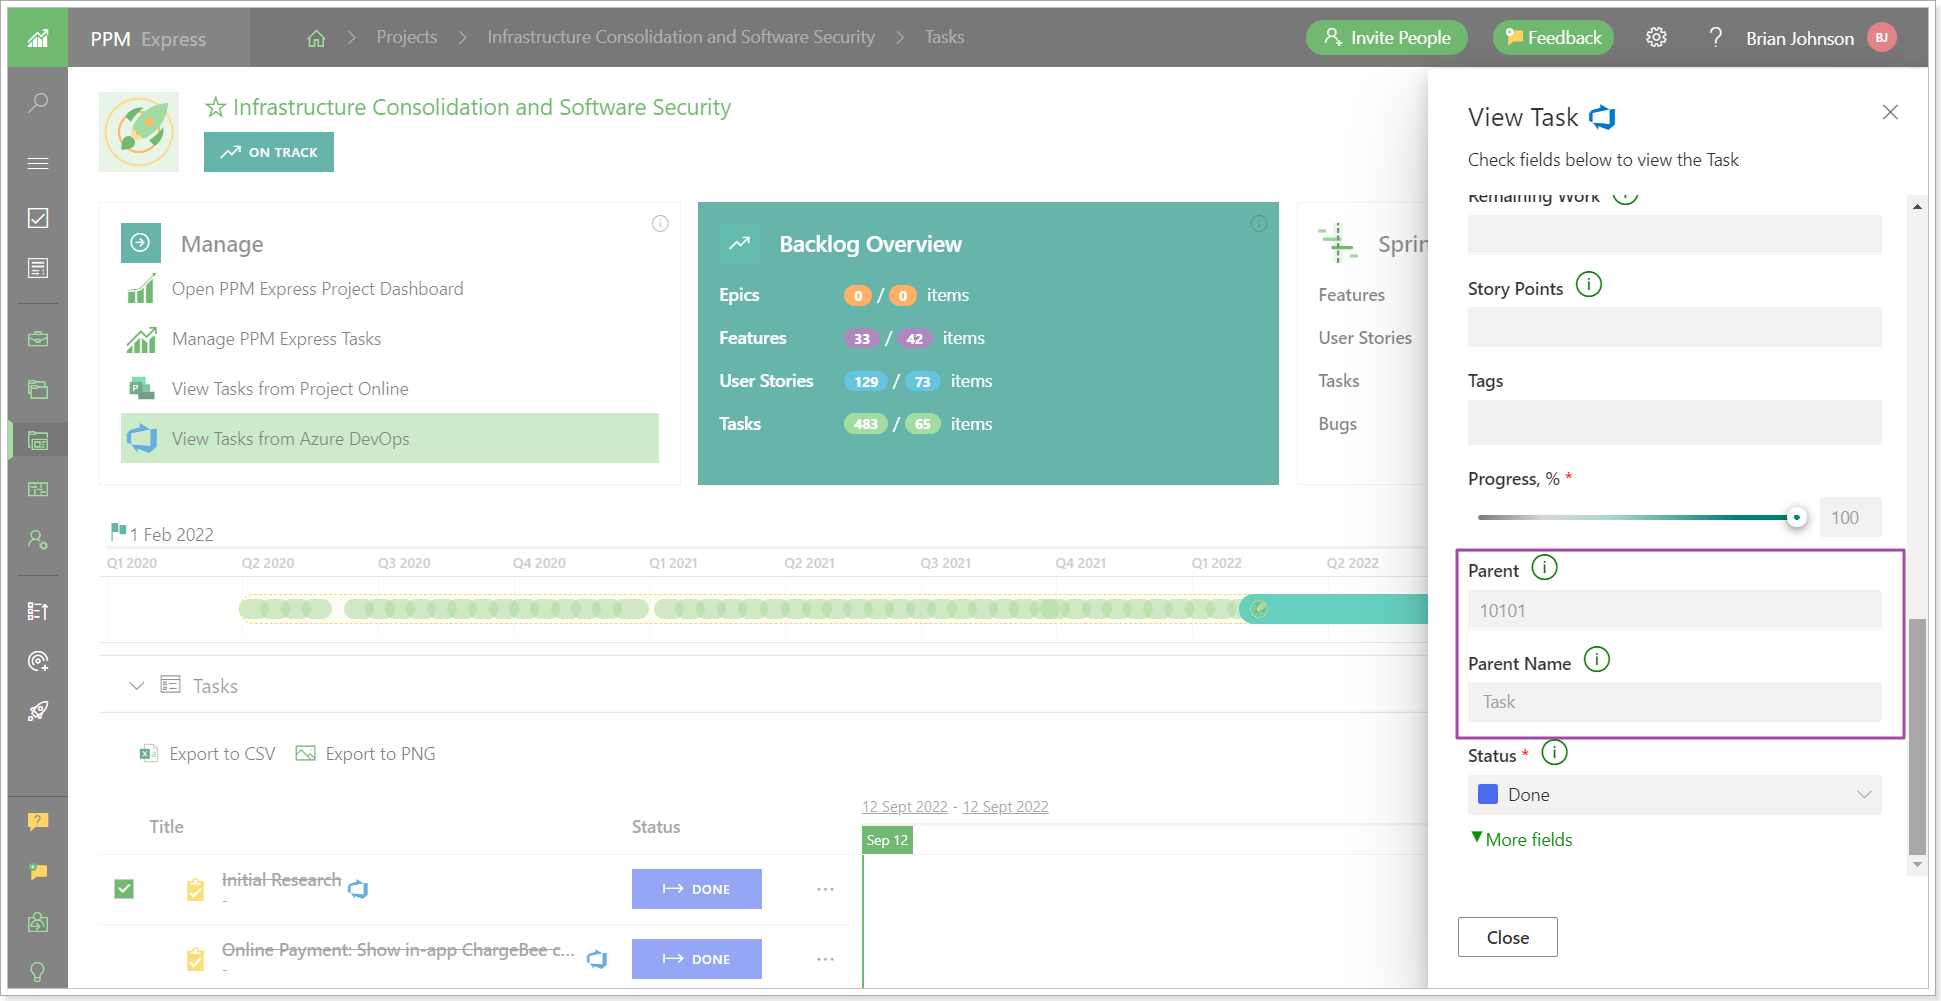
8. The field ‘Parent Name’ was added to the field mapping of the Azure DevOps connection.
The 'Parent Name' field allows bringing the name of the parent elements in addition to the Parent ID to the task details.
9. It is now possible to synchronize items marked as Milestones in Monday.com as milestones to the PPM Express Schedule section.
To bring items marked as milestones, the mapping should be done correctly while configuring the scenario: Due Date → Timeline Finish, Start Date → Timeline starts, Is Milestone → Timeline is Milestone.
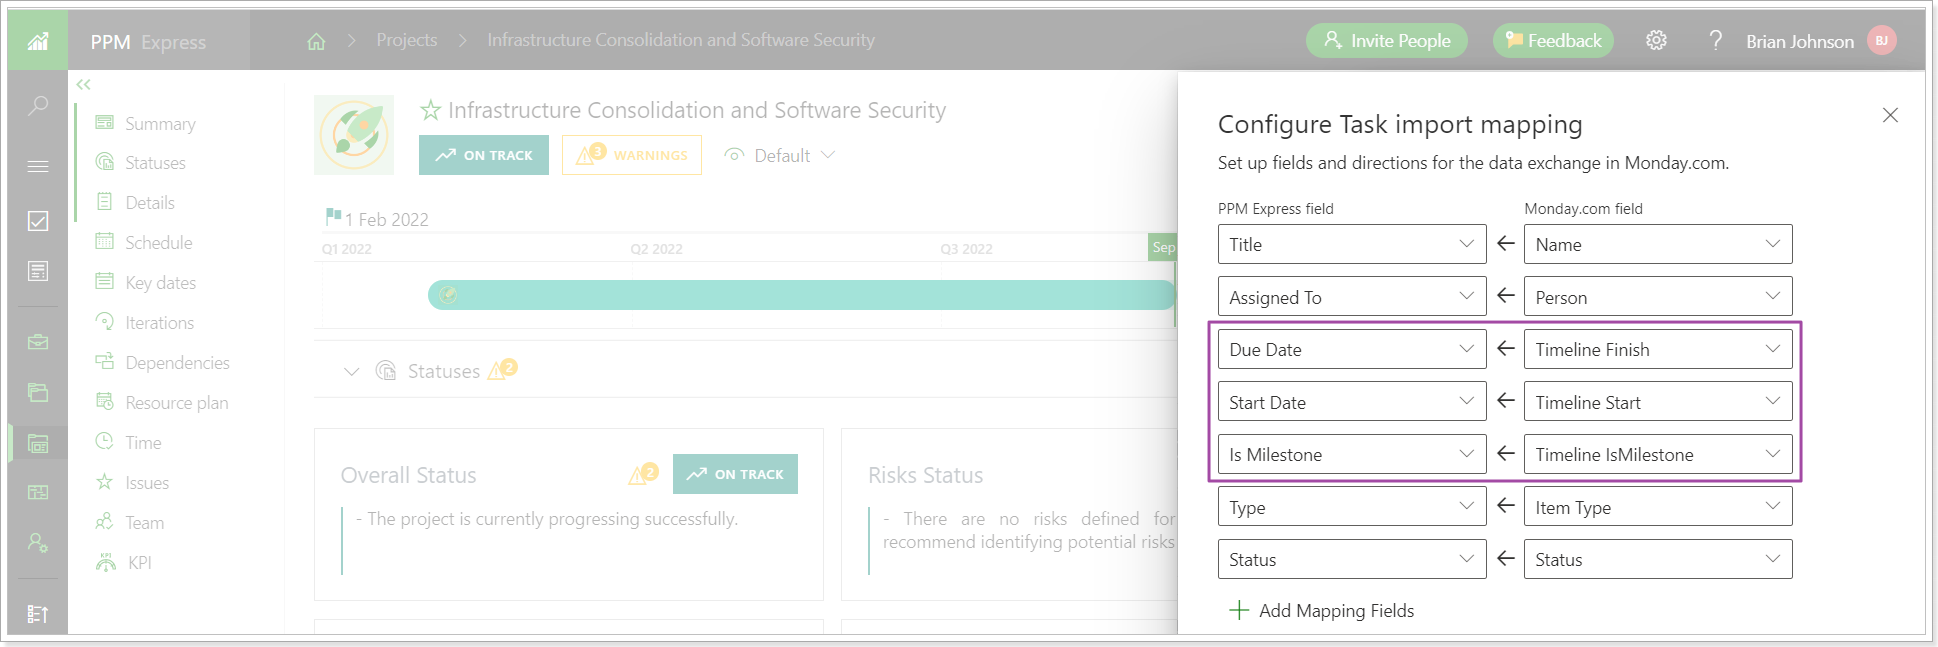
In this case, the tasks will be created and marked as 'is milestone' in the Schedule section and milestones will be created in the ‘Key Dates’ section of a Project when the synchronization is completed.

10. A new View ‘Resource Management’ was created for new PPM Express tenants.
The Resource Management view contains the following sections:
- KPI section (with pre-defined KPIs)
- Team Section
- Resource Plan section
This view is used to quickly review the information for Resources, and track the related KPIs with Project Team and Resources.
The same View can also be created manually by existing users.
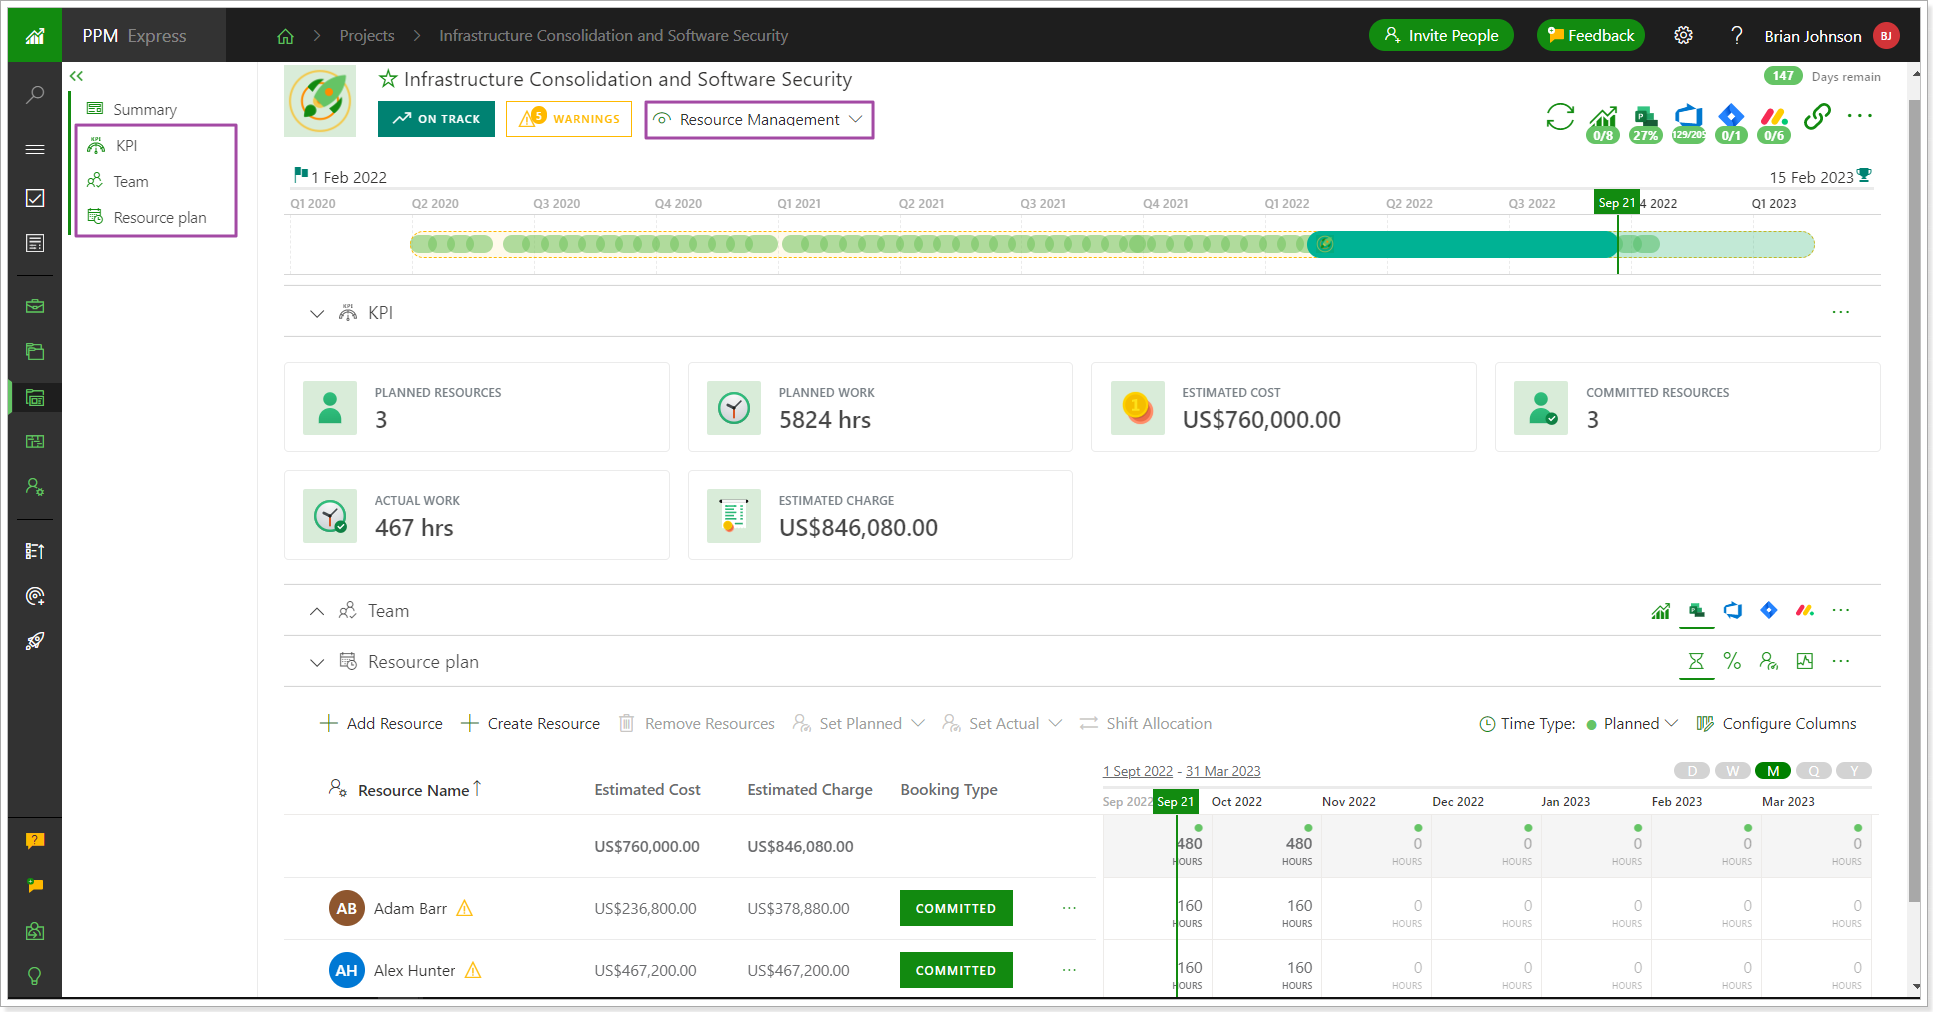
11. New fields were added to the Project Details section.
The Following fields are selected by default in the KPI section of the Resource Management view of the Project Dashboard.
- Planned Resources (the number of planned resources in a resource plan)
- Committed Resources (the number of committed resources in a resource plan)
- Planned Work → calculated field 'Total Planned'
- Actual Work → calculated field 'Total Actual'
- Estimated Cost (calculated field)
- Estimated Charge (calculated field)

12. The Resource allocation process and navigation were improved.
Before: The ‘Set Planned’ button was used to allocate resource(s) for the project. This button was available from the grid, from the panel, and from the ellipsis button. Also, when adding a resource to your project, it was possible to allocate resource(s) at once. If the Start and Finish dates for the project were not set, the resource could be allocated for a period of six months. It was not easy to change the allocation period to match the project dates or specific time periods.
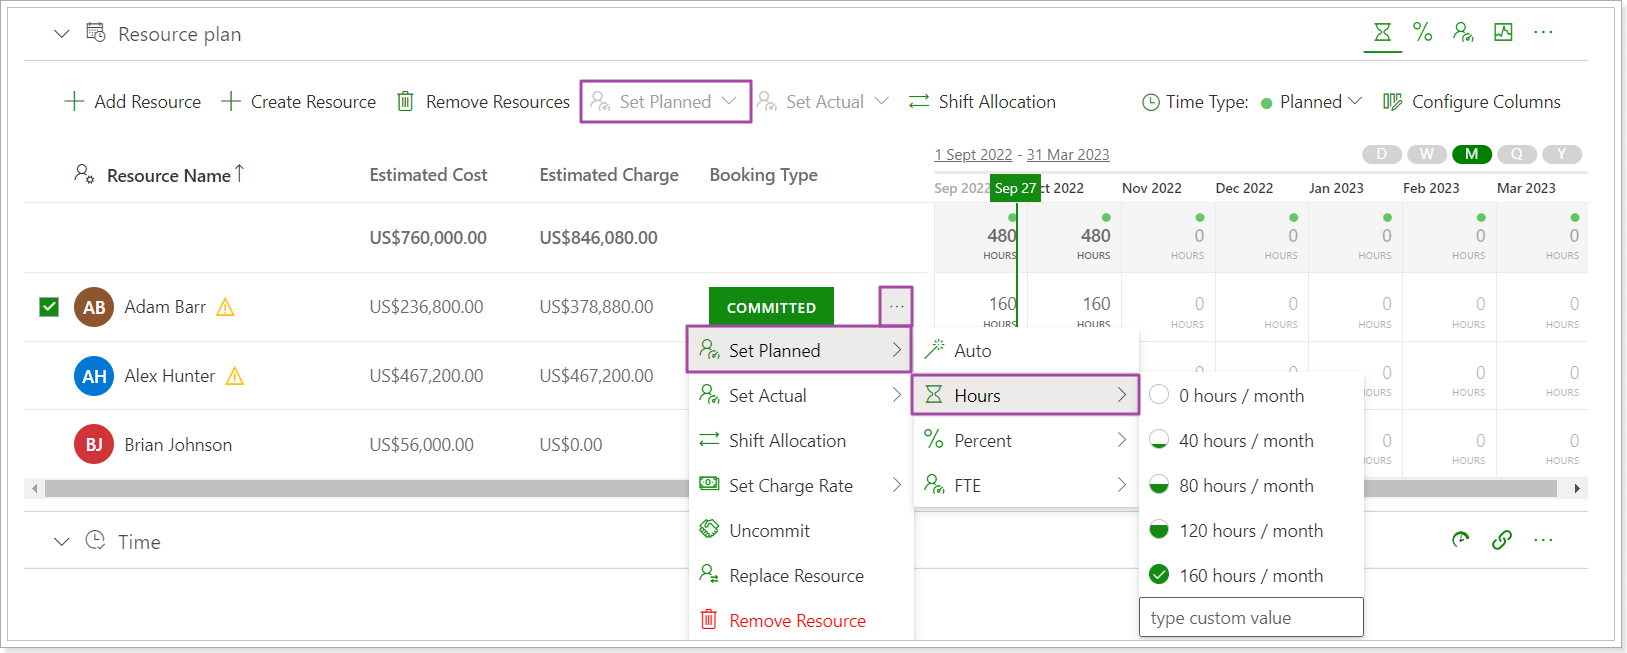
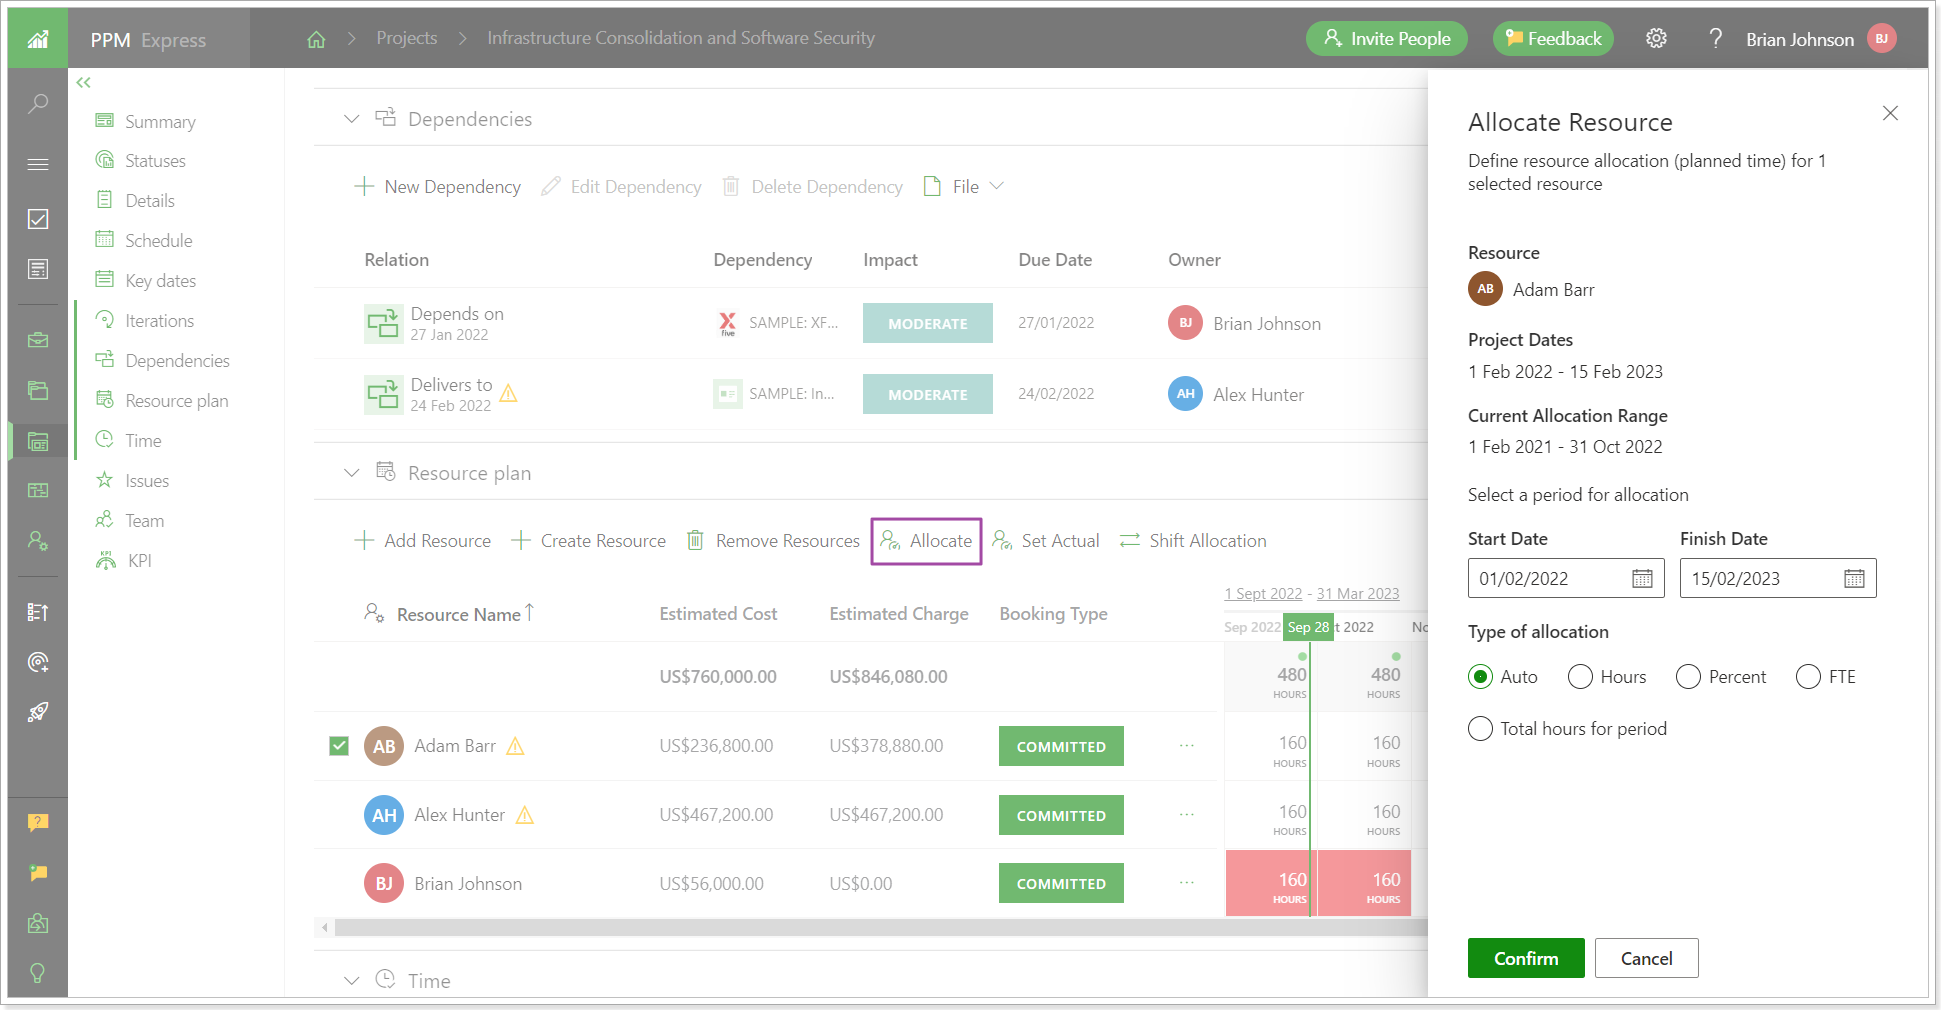
Now: The ‘Set Planned’ button was changed to ‘Allocate’. Adding a resource and allocating it are two separate steps now. First, you search and add a resource to the project (by name, skills, tags). Then, you plan the resource(s) hours for the project. If you need to allocate the resource(s) for a day, week, month, quarter, or year, use the ‘Allocate’ button from the grid and be sure to set the needed timescale. To allocate resource(s) for project dates or any other certain time period, use the ‘Allocate’ button from the ellipsis or from the panel. On the ‘Allocate Resource’ panel, you can now see the project dates, current allocation period of the selected resource(s), and type of allocation. The project dates will be set per default, but you can also set a custom period instead. The same panel was also added to the ‘Set Actual’ option to allow a user to quickly specify actual hours for the whole project or specific time period.
Still haven't chosen the right PPM software? Request PPM Express trial.


